Well there is one thing being so caught up with different sewing projects; not Blogging regularly! It only seems a day or two ago that I wrote my last post but it wasn't: Sorry.
I hope you are all still moving ahead nicely with your Blazer makes? Don't worry if you've not yet started as there is still loads of time. @Ooobop has made her toile for Mr Ooobop and shares it here. Paul @SewingMan4Men has started his make and Di @DiKendall has been tremendously busy, go and check out her Saville Row Coat! It has been so great to see other people have a go at this and can't wait to see all the finished Blazers. Perhaps we should all meet up for a photo shoot!!
So my #Blazerof2016 challenge has come to the end, for me at least. I wanted to get the Blazer finished as I had somewhere special to wear it. Today I will discuss the lining and finishing touches before revealing my make.
My #Blazerof2016 pattern (Burda 7046) is a part lined Blazer and as I live in the UK I can't see why you would want only part of a lining. It is really easy to make a full lining as I will explain.
You will use all the pattern pieces that you made the Blazer from to make the lining, with a few exceptions.
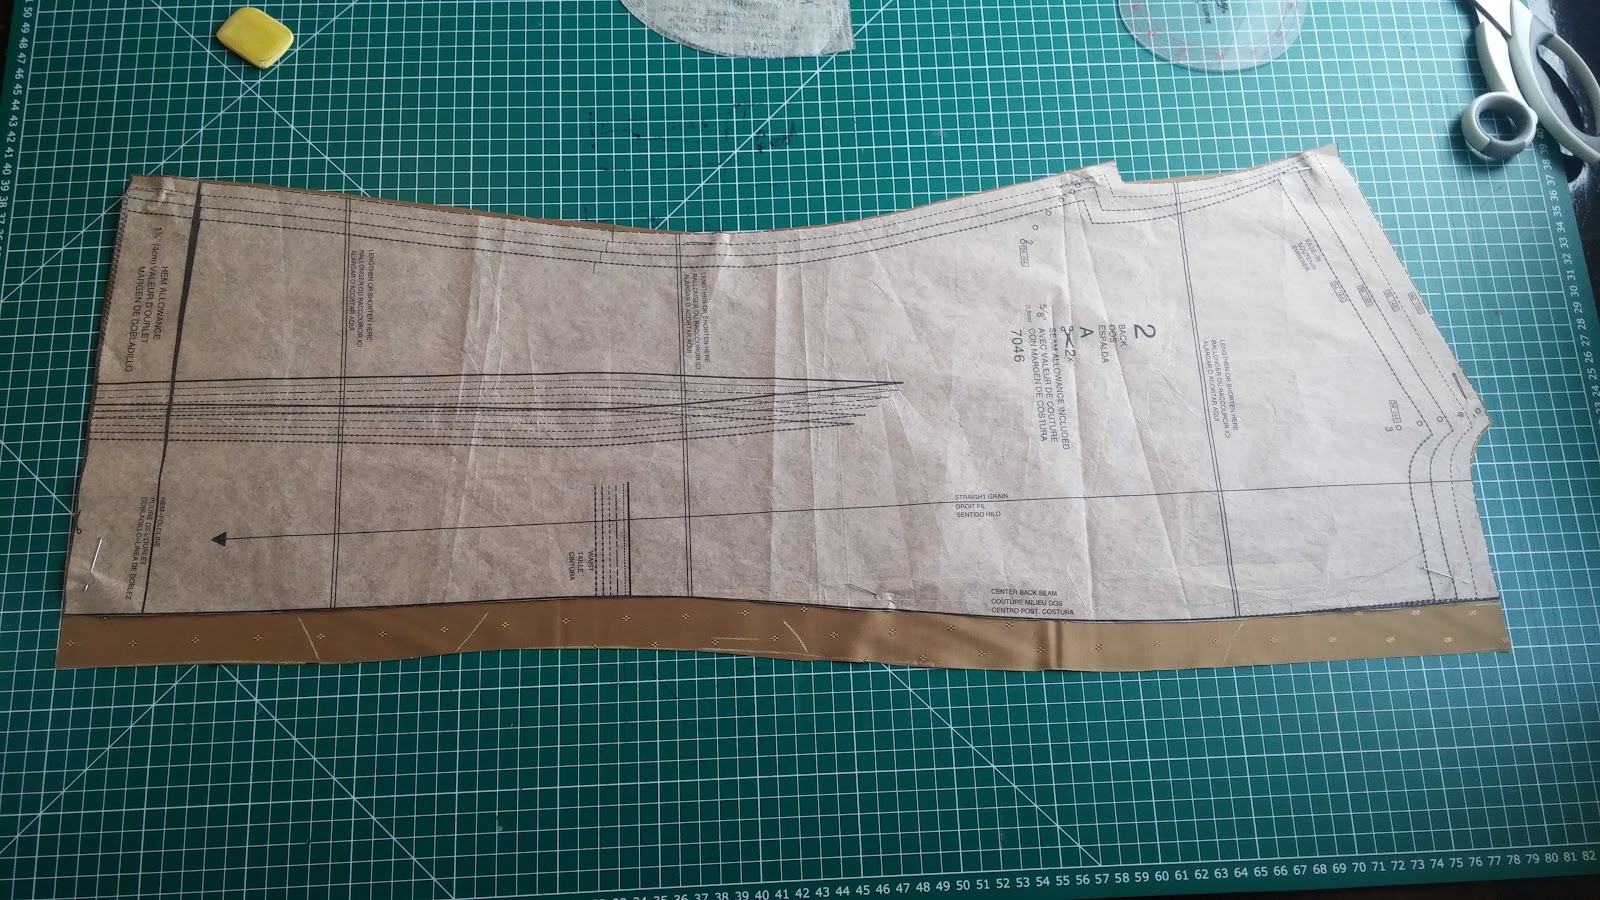
The back (lining) has to be cut a bit wider to allow for the insertion of Box Pleats. The box pleats give more ease across the shoulders and hips when the jacket is being worn.
Add 1 inch to the centre back seam of your pattern piece. Don't worry about the darts (if you have them) as that will be taken care of later.
You need to remove enough of the lining at the top so it will meet the neck facing. Place the facing pattern piece around the top of the back linings and add the pattern seam allowance. Note the CB seam is 1 inch wider.
Now with RST sew the centre back seam with the patterns seam allowance.
Next we add the box pleats. They are marked 1 inch further in from the seam line you just finished. The first pleat is marked from the top down approximately 4 inches then angled out towards the centre back seam edge.
The second pleat is marked in a similar manner. This pleat should finish around the top of the hip and be roughly centred on the waistline.
Finally the bottom pleat is an upside down version of the top pleat.
Now at this step you can loose any darts. My darts run to the bottom edge of the back so measure the width of one dart (at the bottom) and taper your last pleat (adding the dart width). If your jacket has no darts or fisheye darts, that don't run to the bottom edge, you don't need to adjust the pleat at the bottom!
This picture might help!
Here is the finished back from the inside with pleats visible.
The front pattern pieces also need a little adjustment and remove the facing size. Again be sure to add a seam allowance along the facing seam line.
The rest of the lining is constructed as you did for the jacket. Again if the front contains darts that run to the bottom sew the side seam a little wider to accommodate.
Now when it comes to attaching the lining I always do it the same way and will not bombard you with photos as it is easier to explain.
With the jacket inside out, pin the lining RST along the facing. Start at the centre neck point (using the box pleat seam as centre mark) and pin around to the bottom of the facing. Now sew the lining on all around the facing stopping about 1 inch before the hem.
Turn the jacket and pass the linings through the sleeves. Press the lining up at the hem and cuffs.
I always HAND STITCH the lining bottom AND cuffs. Why? because I like to and I enjoy the last little bit of hand finish.
I use a small herringbone stitch to attach the lining as it allows for a little movement when the jacket is being worn. It also looks nice! Personally the hand finished lining suits me and I always feel a jacket wears better because of the extra 'give'.
So here it is in all resplendent glory in the spring sunshine along with a few detail shots.
Am I pleased with it? Yes. I enjoyed this make and I still have a few months to make another before the #Blazerof2016 finishes!!!
My aim in all this was not to create a truly authentic tailored garment but to show how some tailoring techniques and skills can be used to turn a commercial pattern into something a little more special. I'm really looking forward to what everyone else makes and I promise you will all see me wearing this Blazer soon enough!
My next post will be a little bit of a mix and match....Some exciting news, A free pattern and more sewing related ramblings.
Until next time.......Happy sewing!
Labels: #Blazerof2016, Burda, buttonhole, Challenge, MDS, Sewing